Free Crochet Patterns from Crochet N More
| Free Newsletter Four New free crochet patterns each month. Delivered twice a month. |
||
The Dog House Help Us Out CE Links
|


This pattern courtesy
of Crochet 'N' More To print a new copy
visit:
The
following pattern is my original design. MATERIALS: Bernat
Baby Coordinates - Buddy Blue (used in Photos A, B, & C) Stitches: ch, (sc, hdc or dc) Difficulty: MEDIUM STEP ONE: STEP TWO: STEP THREE:
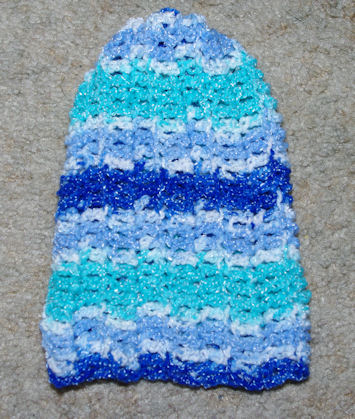
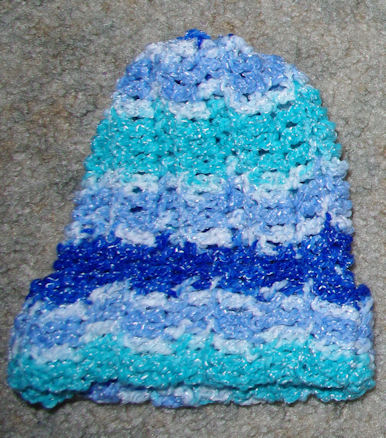
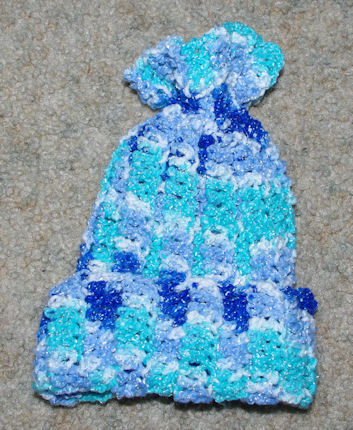
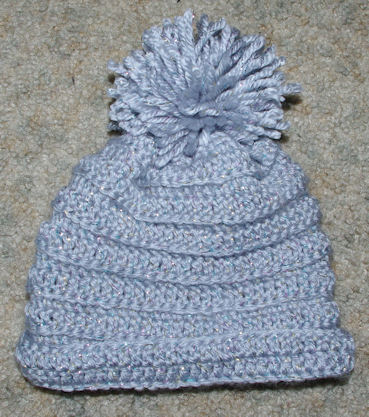
To make a basic hat without a folded brim (Photo A), make your foundation chain approximately half of your original measurement. To make a hat with a folded brim (Photo B), make your foundation chain approximately half of your original measurement plus 2" for the brim. To make the hat with a decorative top and a brim (Photo C), add 2 more inches to the foundation chain. R1: Make enough chains to measure the length you need. (from step two) R2: Ch3, turn. Dc in the BLO of ea st. Rep R2 until the piece measures near the measurement for the head circumference. (from step three) Holding the first and last rows tog, sl st the cor sts tog through the unworked lps on R1 and the BLOs of the last row. Fasten Off. FINISHING Using a yarn needle and a piece of the same yarn, sew through the row ends and gather the top closed. For the decorative top hat, use the yarn needle to weave the yarn through the stitches about If your hat has a folded brim, turn it up. As an alternative to this pattern, my niece (Sasha Watts) decided she wanted her rows to be horizontal instead of vertical.
(Photo D)
Therefore her foundation chain needed to match the measurement of the head circumference in Step Three. Then she made enough rows to get the measurement in Step Two. Use your imagination... this pattern has endless possibilities. HAPPY CROCHETING
Back to the free crochet patterns directory For stitch abbreviations and instructions please visit our Crochet Basics page:
|
||||||||||||