Free Crochet Patterns from Crochet N More
| Free Newsletter Four New free crochet patterns each month. Delivered twice a month. |
||
The Dog House Help Us Out CE Links
|
Crochet pattern courtesy
of Crochet 'N' More To print a new copy
visit:
The
following pattern is my original design. MATERIALS: Red Heart
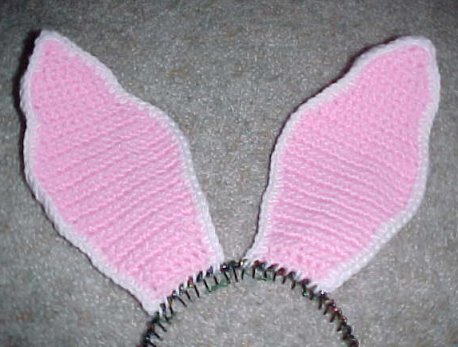
Super Saver (approximately 2 ounces of pink and 2 ounces of white) Stitches: ch, sc, sl st, sc2tog, sc3tog Difficulty: MEDIUM/DIFFICULT MAKE FOUR EARS: R1: Ch8, sc in the hump
of the 2nd ch from the hook. Sc in the hump of ea rem ch. (7sts) [right side] R2: Ch1, turn. Sc in ea st. (7sts) R3: Ch1, turn. 2sc in the first st. Sc in ea st across to last. 2sc in last st. (9sts) R4: Rep R2. (9sts) R5: Rep R3. (11sts) Rs6-9: Rep R2 (11sts) R10: Rep R3. (13sts) R11: Rep R2. (13sts) R12: Rep R3. (15sts) Rs13-18: Rep R2. (15sts) R19: Ch1, turn. Sc2tog. Sc in ea st across to last 2sts. Sc2tog. (13sts) R20: Rep R2. (13sts) R21: Rep R19. (11sts) R22: Rep R2. (11sts) R23: Rep R19. (9sts) Rs24-27: Rep R2. (9sts) R28: Rep R19. (7sts) R29: Rep R19. (5sts) R30: Rep R19. (3sts) R31: Ch1, turn. Sc in ea st. (3sts) R32: Sc3tog. (1 st) Fasten off. JOINING Using the H hook, holding
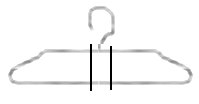
one white ear and one pink ear with wrong sides facing. NOTE: The bottom of the ear is still open. Repeat joining for other ear. ASSEMBLY Cut a wire clothes hanger
on either side of the hanger.
Insert one piece in between the white and pink layers for each ear. Thread the yarn tail onto
a yarn needle and use it to sew the ear to the headband. You can bend the wire to
achieve the shape you want for your ears.
HAPPY CROCHETING
Back to the free crochet patterns directory For stitch abbreviations and instructions please visit our Crochet Basics page:
|
|||||||


