Free Crochet Patterns from Crochet N More
| Free Newsletter Four New free crochet patterns each month. Delivered twice a month. |
||
The Dog House Help Us Out CE Links
|
Crochet pattern courtesy
of Crochet 'N' More To print a new copy
visit:
The
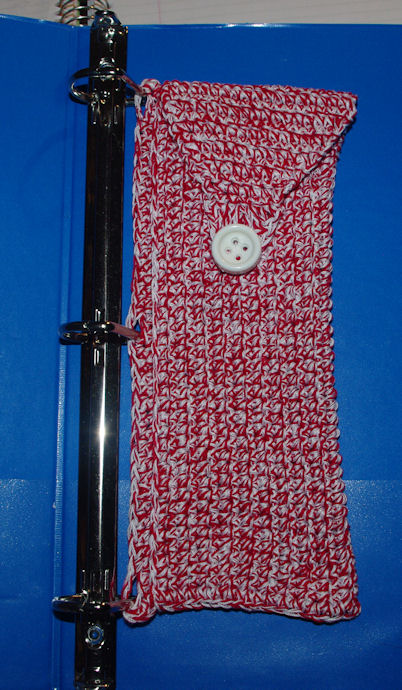
following pattern is my original design. MATERIALS: Bedspread Cotton - Red- 1 ball & White- 2 balls Stitches: ch, sc, sl st, dc, tr. Gauge= 6 rows and 5 stitches = 1" Difficulty: MEDIUM R1: Ch41, sc in the hump of the 2nd ch from the hook. (8sc) NOTE: The Ch2 sps are the binder ring holes. Check the positioning in your binder now. R2: Ch1, do not turn. Sc in same st and in the next 39sts. (40sc) Rs3-40: Ch1, turn. Sc in ea st. (40sc) Fold piece holding R3 and R40 tog. Ch1, sc cor sts tog across row ends. Thread a yarn needle with a 10-12" length of the same three strands of thread. Begin on the sewn end and st cor sts to join R3 & R40. Fasten off. FLAP With the open end on the top and the ring holes on the left, join the same thread (all three strands at once) with a sc in the first st on the far right on the back side of the opening. Flap is worked across 18sts along the backside of the opening. R1: Sc in ea st. (18sts) Rs2-5: Ch1, turn. Sc in ea st. (18sts) R6: Ch1, turn. Sc2tog. Sc across to last 2sts. Sc2tog. (16sts) R7: Ch1 turn. Sc in ea st. R8: Rep R6. (14sts) R9: Rep R7. (14sts) R10: Rep R6. (12sts) R11: Rep R7. (12sts) R12: Rep R6: (10sts) R13: Rep R6. (8sts) R14: Rep R6. (6sts) R15: Rep R7. (6sts) R16: Ch1, turn. Sc in the first st. Fasten off. FINISHING: Sew the button on the front in position to align with the buttonhole.
HAPPY CROCHETING
Back to the free crochet patterns directory For stitch abbreviations and instructions please visit our Crochet Basics page:
|
|||||||


