| Free Newsletter Four New free crochet patterns each month. Delivered twice a month. |
||
Patterns we Sell The Dog House Help Us Out CE Links
|
Shop Amazon Back to School - Save on Supplies, Learning Toys & More
Christian Thriller

Epic battle of good vs. evil.
12 Guardians Books 1-3,
now available as an
ebook and paperback.
Click Here!
God Bless You!
FEATURES IN THIS ISSUE:
GENERAL
NEWS
QUESTIONS
FROM THE CNM MESSAGE BOARD
WORDS
OF ENCOURAGEMENT
BIBLE
TRIVIA
PAGES
UPDATED
NEW
LINKS
MEMBER
PATTERNS
CROCHET
STITCH or TECHNIQUE
CROCHET
TIP
VIEWER
FEEDBACK
CONTEST/GIVE-AWAY
INFORMATION
CLASSIFIED
SECTION
HUMOR
GENERAL NEWS
The Incident - True story about how God works
This is about my Father In Law, James Hamblin.
We asked for and received prayer from many of our
crochet family after his accident and during his recovery process.
For those who do not know, James fell in October
causing multiple injuries which took months to overcome.
He is home now and doing well.
https://www.indiegogo.com/projects/the-incident-true-story-about-how-god-works#/story
QUESTIONS
FROM
THE CNM MESSAGE BOARD
Post your crochet
question on
The
Crochet 'N' More Message Board
and you might see it here!
QUESTION
None at this time... stop by and leave your question.
WORDS OF ENCOURAGEMENT
“Remember... Humility is not thinking
less of yourself, it's thinking of yourself less.”
~~ Dr. David Jeremiah ~~
~ ~ ~ ~ ~ ~ ~ ~ ~ ~ ~ ~ ~ ~ ~ ~ ~ ~ ~ ~ ~
But at the evening offering I arose from my humiliation, even with my garment and my robe torn, and I fell on my knees and stretched out my hands to the Lord my God; and I said, "O my God, I am ashamed and embarrassed to lift up my face to Thee, my God, for our iniquities have risen above our heads, and our guilt has grown even to the heavens. Since the days of our fathers to this day we have been in great guilt, and on account of our iniquities we, our kings and our priests have been given into the hand of the kings of the lands, to the sword, to capitivity, and to plunder and to open shame, as it is this day. But now for a brief moment grace has been shown from the Lord our God, to leave us an escaped remnant and to give us a peg in His holy place, that our God may enlighten our eyes and grant us a little reviving in our bondage. For we are slaves; yet in our bondage, our God has not forsaken us, but has extended lovingkindness to us in the signt of the kings of Persia, to give us reviving to raise up the house of our God, to restore its ruins, and to give us a wall in Judah and Jerasalem.
Ezra 9:5-9
Come and hear, all who fear God, and I will tell of what He has done for my soul. I cried to Him with my mouth, and He was extolled with my tongue. If I regard wickedness in my heart, the Lord will not hear. But certainly God has heard; He has given heed to the voice of my prayer. Blessed be God, Who has not turned away my prayer, nor His lovingkindness form me.
Psalm 66:16-20
And when you pray, you are not to be as the hypocrites; for they love to stand and pray in the synagogues and on the street corners, in order to be seen by men. Truly I say to you, they have their reward in full. But you, when you pray, go into your inner room, and when you have shut your door, pray to your Father who is in secret, and your Father who sees in secret will repay you. And when you are praying, do not use meaningless repetition, as the Gentiles do, for they suppose that they will be heard for their many words. Therefore do not be like them; for your Father knows what you need, before you ask Him. Pray, then, this way:
Our Father who are in heaven. Hallowed be Thy name. Thy kingdom come. They will be done. On earth as it is in heaven. Give us this day our daily bread. And forgive us our debts, as we also have forgiven our debtors. And to not lead us into temptation, but deliver us from evil. For Thine is the kingdom, and the power, and the glory, forever. Amen.
For if you forgive men for their transgressions, your heavenly Father will also forgive you. But if you do not forgive men, then your Father will not forgive your transgressions.
Matthew 6:5-15
"For where two or three have gathered together in My name, there I am in their midst."
Matthew 18:20
And Jesus answered and said to them, "Truly I say to you, if you have faith, and do not doubt, you shall not only do what was done to the fig tree, but even if you say to this mountain, 'Be taken up and cast into the sea,' it shall happen. And all things you ask in prayer, believing, you shall receive."
Matthew 21:21-22
BIBLE TRIVIA
Where in the Bible is
The Great Commission?
Click
Here to Purchase
"The Complete Book of Bible Trivia"
Click here for more Bible Trivia
PAGES UPDATED
FREE
PATTERNS
The following
patterns will be added to our Free Patterns soon.
NEW LINKS
The following link(s) have been added to our links pages.
None at this time.
(SUBSCRIBERS
SEE THESE FIRST)
However, these patterns will be added to the
Crochet 'N' More
website after the next issue is sent out.
| Check out all of our free crochet patterns. | |
Purchase your crochet supplies today! Use the promotion code below |
|
CROCHET STITCH or TECHNIQUE
(A
different crochet stitch and/or tip featured in each issue...
to be added later to the Crochet Basics page)
How to Crochet - Weaving Ends (and fastening off)
Once you complete your last stitch on a project you will have one loop on your hook.
Cut the yarn leaving about a 4-6" tail to be woven in.
Yarn over, draw the yarn tail completely through the loop, and pull it tight.
(That is called fastening off.)
This secures the yarn so the project doesn't unravel.
Now you need to weave in the yarn tail using a crochet hook or a yarn needle.
The yarn needle is quicker and you can weave the strand in without disturbing the stitches.
Here's how:
"On-line
encyclopedia of knitting and crochet facts"
http://www.lionbrand.com/faq/learnToCrochet.pdf
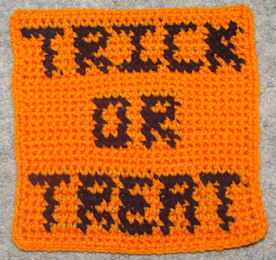
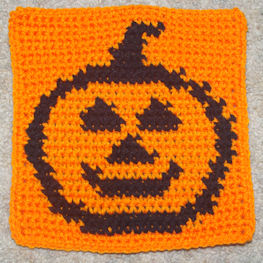
Join afghan squares with a holiday theme
to make a table runner, a wall hanging, etc.,
to complement your holiday decor!
Scrap Yarn Ideas ... do you have number 90?
The following
page is compilation of uses for scrap yarns:
SCRAP YARN IDEAS
If you have a use that's not listed email me!
VIEWER FEEDBACK
NOTE: Any comments left on the CNM website or sent via email may be posted here.
Leave your message in our guestbook... and it may appear in an issue of the CNM Newsletter!
Re: Joining
What is a good idea for putting these christmas tree squares together?
I really appreciate the pattern but how do you get the crocheted together.
kmdavis
<< Reply >>
Many of my patterns are for afghan squares only.
I tend to leave the finishing techniques up to the individual crocheter.
You can assemble the squares using any method you choose.
Take a look at this page for joining methods:
http://www.crochetnmore.com/joiningsquares.htm
Via the Crochetnmore YouTube Channel
RE: How to Crochet : Reverse Half Double Crochet
<< Comments >>
This was very easy to understand, thanks!
Is there an advantage to doing a reverse half dc rather than just turning the work and doing a sc edging?
Cindy DeGroot
<< Reply >>
Cindy DeGroot:
You're very welcome.
There is no advantage to using one method over the other... it's a matter of visual preference.
Via the Crochetnmore YouTube Channel
RE: How to Crochet - How to Place a Marker
<< Comments >>
Thank you!
Jennifer Garrett
Re: Subject: Kitchen Towel Topper (Crochet)
Hello! I enjoyed seeing the pictures of your crochet projects;
however, a few years ago I crocheted a topper for a cute "halloween"
towel but have lost the instructions for it. It was very easy.
Somehow my yarn was attached to the top edge - then dc several rows
before starting to decrease for the narrow "handle" to a length long
enough to fold over at the top for the button. The narrow part also
has a buttonhole. Any help from you would be appreciated. I would
like to do this project on some Christmas themed towels for gifts.
Thank you Lorraine W.
<< Reply >>
I have a towel topper pattern on this page:
http://www.crochetnmore.com/dishtoweltopper.htm
You can change the seasonal theme with your choice of towel.
I also have a towel topper pattern that isn't directly attached to the towel:
http://www.crochetnmore.com/nosewtoweltopper.htm
Many people prefer that one Smile
Hi, can you please explain the step for your dog sweater that says in RND 22 “Hdc in each st and ch around” I’m not sure what to do here. I understand the Hdc in each st part but where do I ch around? A bit confused. So far I’m loving your pattern and I’m almost there to completing my first one. I’m a self taught beginner and have done a few easy projects. My first dog sweater.
Thank you
dgreen10
<< Reply >>
For Rnd 21 you worked a half double crochet into each half double crochet.
Then you made 16 chains (or the number for your size sweater if you are adjusting the pattern)
Then connect that chain you just made on Rnd 21 to the first stitch you made on that round.
Now chain 2 and continue with Rnd 22... working a half double crochet into each half double crochet and into each of the chains you made.
Each additional round will be worked without turning at the end.
Re: Crochet help!
My pattern says make 2 ch. rnd1: 6dc into first ch. 6dc.
I can't do it. I know how to chain and double crochet but in not sure where to do my 6dc after the 6dc into first ch. is it into the second chain?
Help much appreciated!
Rachel
<< Reply >>
Once you make the 2 chains and work the 6 double crochets into the first chain you are finished with that row.
The part of the instruction that says 6dc at the end is only for reference.
It is used as a check point for you to check your work... to make sure you have 6 dc at the end of that row.
Subject: BasicsPage
I was wondering if you could tell me what it means to crochet over a stitch, for example my pattern says : working over slip stitch of previous round triple,ch1 triple, ch2 triple ch1.
deborah goldstrom
<< Reply >>
That means you work those stitches into the same stitch the slip stitch was worked into...
so the stitches are worked over that slip stitch.
I am working on a vest for my sister-in-law and am confused about two things.
I have attached a Word file with the pattern instructions.
The pattern is called 1960's crochet Hippie Vest and it is from Lion Brand.
Here is a link to the pattern:
http://www.lionbrand.com/patterns/cms-vest.html?iP=1&p=2&ss=
I only made it 139 stitches wide (instead of 208) so I moved the armhole markers to 34 stitches from each side.
I am unsure how to decrease with an open pattern like this. I have been crocheting two DC on each end although the pattern does not call for that.
Here are the pattern instructions:
Shape V-Neck: Keeping to pattern, dec 1 st at beg and end of each row 17 times. AT THE SAME TIME, when piece measures 17" from the end, begin shaping armhole as follows:
Right Front: RS Row: Work to within 13 sts of right side-seam marker (armhole edge), turn. Dec 1 st at armhole edge every other row 4 times and cont neck decs. Work in pat until armhole measures 10" from beg. Fasten off
Back: With RS facing, join yarn 13 sts in from right side-seam marker, ch 3, then keeping to pat work across to within 13 sts of next left side-seam marker, turn. Dec 1 st at beg and end of every other row 4 times for armholes. Work even in pat until armholes measure 10" from beg. Fasten off.
Left Front: With RS facing, join yarn 13 sts in from left sideseam-marker (armhole edge), ch 3 and cont in pat dec 1 st at armhole edge every other row 4 times and cont neck decss. Work in pat until armhole measure 10" from beg. Fasten off
When I complete the last row before the "Shape V-Neck" part, I tried to just turn and slip stitch in first stitch and then do a chain 3 but that throws off the pattern. How do you decrease and keep the pattern?
And if I am making it smaller, do I want to leave 26 open stitches for the arm hole? That seems like a lot.-- almost 8 inches of blank space for the armhole.
Plus since I only did 34 stitches per side, there will not be 17 stitches at the shoulders to sew together. Any suggestions on that?
FINISHING: Sew fronts to back at shoulders over 17 sts.
51-13 for armhole =38, minus 17 rows of neck edge = 21, minus 4 for arm hole shaping = 17 stitches.
I hope this makes sense to you. I did email Lion Brand for help, and their response was:
To decrease at the beginning of a row, slip st in the first st. To decrease at the end of a row, simply do not work the last st. On subsequent rows, do not work either of those stitches.
Because it is an open pattern where you skip every other stitch, I don't think that will work.
Thanks,
Sue Smith
<< Reply >>
Traditional decreases will definitely throw this pattern off and
you need to keep the chain stitches in order to stay “in pattern”.
When you are instructed to chain 3 to begin a row... making a slip stitch doesn’t seem like the way to go. If you make one chain stitch and then turn and do a slip stitch it would still throw off the pattern in my opinion.
Try this for decreasing and let me know if it works out:
On each new row where you need to decrease...
skip the first chain space and continue in pattern as before.
Since you began the vest with fewer stitches, I believe the length of the body portion should be shortened in comparison. How much to shorten it would be your call. Also, the armhole shaping does need to be over fewer stitches.
If I am wrapping my mind around this pattern correctly...
The original pattern has:
back = 102 stitches
right side = 51 stitches
left side = 51 stitches
total stitches = 204 (208 chains to begin)
each section is worked 13 stitches from the side seam marker (armhole edge)
Your version has
back = 67
right side = 34
left side = 34
total stitches = 135 (139 chains to begin)
I think your version needs to be worked within 9 stitches from the side seam marker (armhole edge).
This would make the back panel worked over 49 stitches and each front panel over 25 stitches.
As for how many stitches should be at the shoulder edges... the original pattern’s total number of stitches for both front panels is equal to the number of stitches on the back. So when you finish the back, count your stitches and decrease the right and left front pieces so you end up with half that amount for each. The original pattern has you decrease “17 times” on the “shape v-neck” portion... I would try to decrease 12 times and see if it works out okay.
I don’t make clothes very often so I hope this information is helpful to you.
Message via the Crochetnmore Fan Page
Hi how do you do the row count without seeing the other color?
Annie Van Buren Snyder
<< Reply >>
I carry the unused color along/across the top of the stitches and drop it at the point where I will need it on the next row. Sometimes the color will show through a bit though.
Crochetnmore
Via the Crochetnmore Fan Page
Crochet Tip:
A regular crochet hook is 6" long… use your hook to measure those 6" exchange squares.
<< Comments >>
Hmmm - this will work even when I'm working a scarf! I can just measure it up its length in stages...saves reaching for the tape measure or ruler, or even bothering to loop a piece of contrast thread to mark a foot or half a foot...thanks.
Evelyn Mayfield
<< Reply >>
You're welcome.
Scarf Measuring Tips:
(1) Use your arm span - fingertip to fingertip; or
(2) Hold the scarf up and make it long enough to come up to your shoulders.
Kind
words can be short and easy to speak,
but their echoes are truly endless.
Mother Teresa
CONTEST/GIVEAWAY INFORMATION
The
information provided below is strictly for your enjoyment.
If you know of any current contests or giveaways email me.
CLASSIFIED SECTION
Got something you'd like to
sell ?
Looking for a particular item to buy?
Put your ad here to be seen
by approximately 7,000 crafters...
Click here to place an advertisement in our Classified Section.
~ ~ ~ YOUR AD COULD GO HERE! ~ ~ ~
The Incident - True story about how God works
This is about my Father In Law, James Hamblin.
We asked for and received prayer from many of our crochet family after his accident and during his recovery process. For those who do not know, James fell in October causing multiple injuries which took months to overcome. He is home now and doing well.
https://www.indiegogo.com/projects/the-incident-true-story-about-how-god-works#/story
The Buddy Bulletin Newspapers
Stream Your Tweets Outward - To The Wider World
The Website: http://www.buddybulletin.com/
The Blog: http://buddybulletinblog.blogspot.com/
The Buddy Bulletin Newspaper: http://paper.li/SuperEB/1322068502
The Buddy Bulletin #Crafts: http://paper.li/SuperEB/1324399824
cont.
How to Start
a Tutoring Business
cont.
cont.
cont.
=====================================================

See more styles
at
http://www.cafepress.com/crochetnmore
HUMOR
|
~ ~ ~ ~ ~
"Laughter is an instant vacation." - Milton Berle
~ ~ ~ ~ ~
Humor provides us with a valuable tool for
maintaining an inner strength in the midst
of outer turmoil. - Brian Deery
A mother was watching her four year-old son playing outside in a small plastic pool half-filled with water. He was happily walking back and forth across the pool, making big splashes.
Suddenly, the little boy stopped, stepped out of the pool, and began to scoop water out of the pool with a pail.
"Why are you pouring the water out, dear?" asked the mother.
"Because my teacher said Jesus walked on water, and this water doesn't work," he replied.
I was in a customer's home one afternoon and while I was talking to the customer, their 4 year old little
girl whose name was Michelle, tugged on my pants leg
and excitedly exclaimed, "I got a new bicycle, do you
want to see it?"
I said, "Sure Michelle." So off to the backyard we went.
Upon getting into the backyard, I saw a brand new girl's bicycle.
"Boy, Michelle!! That's a beautiful bicycle." I complimented.
"Can you ride it?"
"Yeah, I can ride it," she said, then with a sad face she
pouted, "but it's broke."
I looked at the new bicycle and couldn't see anything wrong
with it, so I asked her, "What's wrong with it?"
"I don't know," she shrugged, "but every time I ride it, it
falls down!"
The parents of two boys (14 and 16 year-olds) went on a
trip for the weekend with friends. They left early Friday
morning and the boys were left alone at home.
That evening the younger boy made the suggestion that they
take their dad's car, pick up some girls and go to the local
disco. The 16 year-old boy could drive a bit but was too
scared.
After some nagging he gave in and off they went to enjoy
the evening. When they got back to the car after a lot of
discothequeing, they noticed a huge dent in the rear of
the car - someone must have bumped into the car and drove
off.
Frantically they phoned their friends to find a panelbeater/spraypainter to fix their dad's car. Finally they found
one who said they must have the car at his house early next
morning. The car was fixed properly and they parked it back
in the garage that afternoon.
Their parents returned the next day but the boys were too
terrified to say anything about the accident. The father
went to get something from the garage, came back very
amazed and said to the family in the lounge, "A miracle
has happened! A guy drove into the back of my car on
Thursday and now it is fixed without a scratch!"
There was a gentleman in the hospital bed next to me. He was
covered with bandages from head to toe.
I said to him, "What do you do for a living?"
He said, "I'm a former window washer."
I asked, "When did you give it up?"
He replied, "Halfway down."
Even though she's been teaching English for 25 years, my mother never felt her age was an issue, until the day she helped a student with a report on the Vietnam War.
Mom recognized the name of a war correspondent mentioned in the textbook and blurted, "I used to go out with him!"
Peering up from his work, another wide-eyed student asked, "You dated someone from our history book?"
My grandson, Justus, age 10, and his sister Taylor, age 13, were always teasing each other.
One day, Justus was getting "sensitive" about things his sister was saying to him.
I reminded him that he had said the same types of things many times in days past.
With quiet reflection, he spoke a gospel truth. "But it doesn't hurt as much coming out of my mouth as it does going into my ears."
An expectant mom let her 4-year-old place his hand on her belly and feel the baby kick.
He asked, "How does the baby get out of there?"
To keep it simple, she just said, "The doctor will help."
His eyes widened: "You've got a doctor in there, too?!"
My ten-year-old son, Andrew and I were waiting in a dentist's office, talking about treatments for his painful tooth.
Entering the room, the dentist asked, "Well, Andrew, which one's the troublemaker?"
Without hesitation, Andrew replied, "My brother."
A fifth grader class was on an educational trip. As they rode along in the school bus, the teacher noticed that one boy was lying facedown in the aisle of the bus with his hands over his eyes.
“Why are you lying in the aisle like that.”
“Well,” said the boy, “if you don’t see anything,
you don’t have to write anything.”
Three-year-old Zoe watched her father Phil working in the garden. "What are you doing, Daddy?" she asked.
He replied, "I'm making a flower bed."
Soon Zoe started digging in the dirt, prompting Phil to ask, "And what are you doing?"
Zoe replied, "I'm making pillows and blankets."
When my father-in-law decided to move after his retirement, he invited us to his home to take a few pieces of furniture he wanted us to have. One item was beautiful but very heavy, an antique dining-room set.
Our teenage son helped us wrestle the set into our truck. It took the whole day, but finally the table, chairs, and china cabinet were sitting in our dining room.
"Just think," I said as I admired the furniture while my son sat resting.
"This set is 100 years old. And someday, it will belong to you."
"Oh, no!" he replied with a stricken look on his face. "You mean I'm going to have to move this thing AGAIN?"
I’d been secretly dating for several months, and
it was time to break the news to my very protective
father.
My mother thought he’d take it better if she explained
to him that my boyfriend was a Marine who had just
returned from Iraq. This pleased Dad immensely.
"A Marine? Good!" he said. "That means he can take
orders."
Review
Crochetnmore at Mamasource
Preview
Parenting Advice at Mamasource!
UNSUBSCRIBE: only do this if you don't enjoy our newsletter :o(


